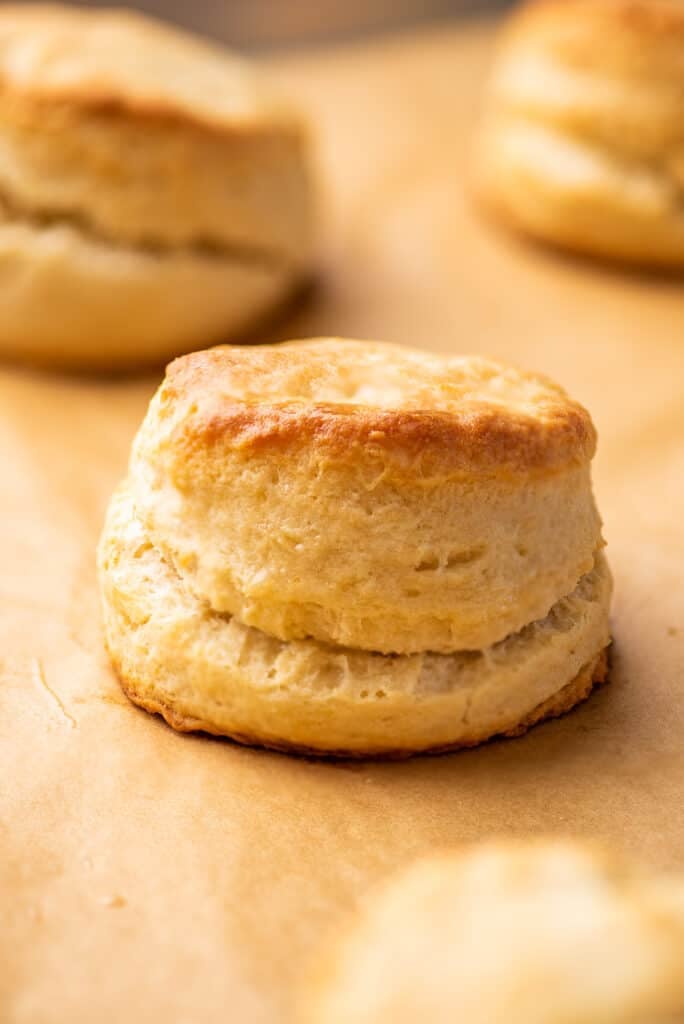
These cream biscuits can be on your table in about 20 minutes. With buttery, lightly crispy outsides and soft, fluffy interiors, they’re a quick and crowd-pleasing side dish.
Everyone should have a good biscuit recipe up their sleeve.
And for nights when you have a pot of soup simmering on the stove and need a quick and easy side dish to serve alongside, you couldn’t ask for a better biscuit recipe than this one.

Quick and Easy Biscuits
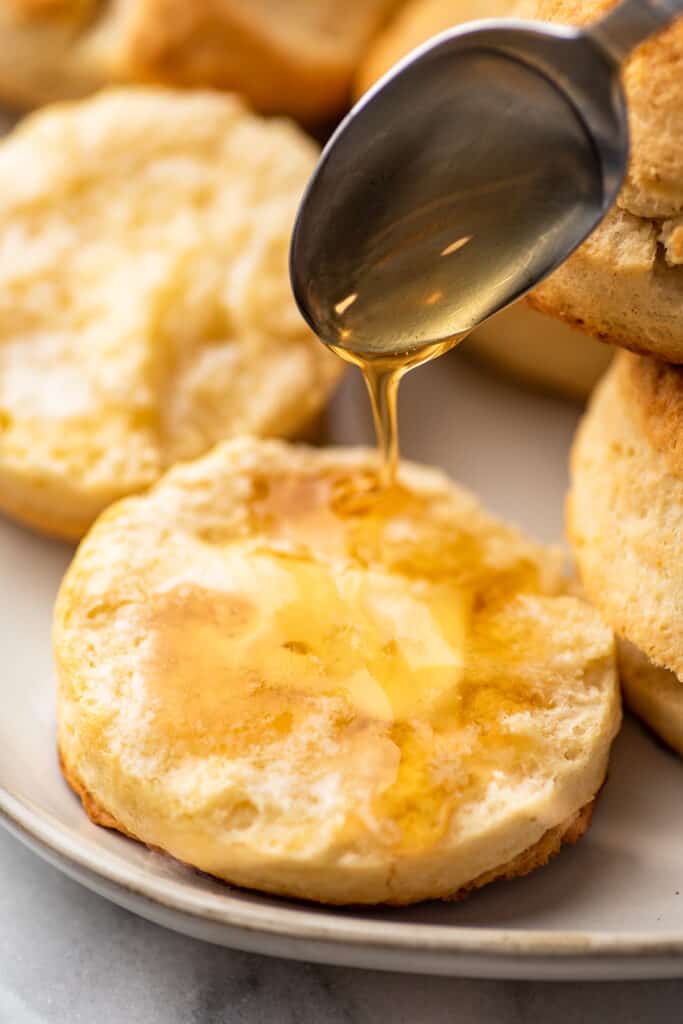
These biscuits can be mixed, baked, and on your table slathered in butter and honey in about 20 minutes.
Unlike traditional buttermilk biscuits which require you to rub chilled butter into flour, cream biscuits are made with heavy cream, so all you have to do is whisk together 4 ingredients and then stir in cream.
Once the dough is cut out, the biscuits are brushed with melted butter, so they bake up perfectly soft and fluffy with buttery, slightly crispy exteriors and are completely irresistible.
Ingredient Notes
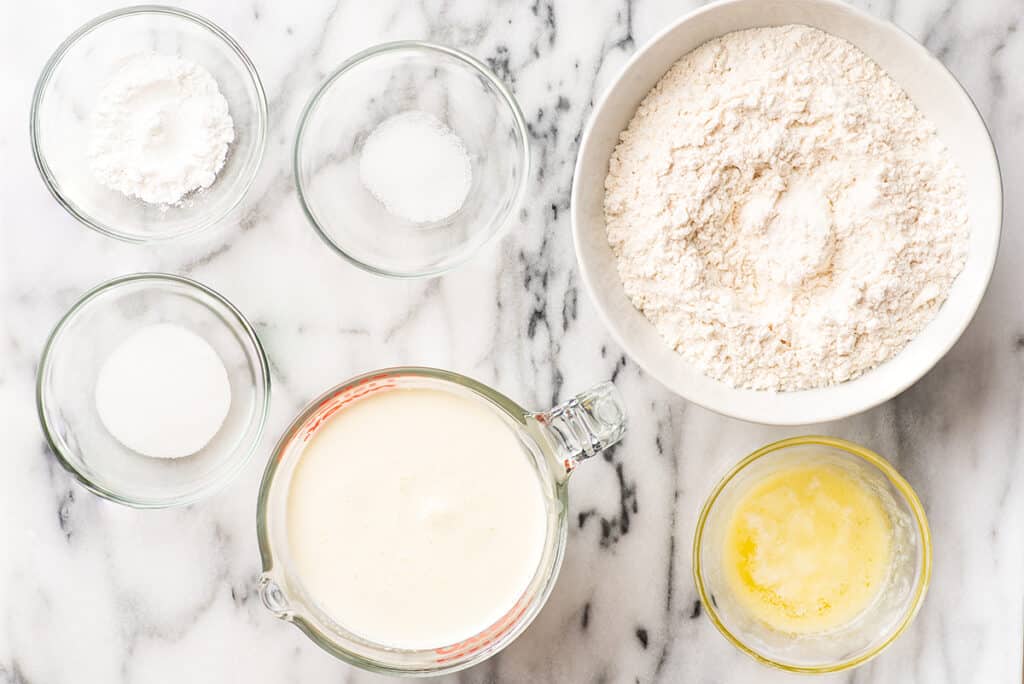
- All-purpose flour: Proper flour measurement is fairly important in this recipe (too much flour and your dough isn’t going to come together), so be sure to follow the measuring instructions in the recipe.
- Heavy cream: This recipe won’t use up an entire carton of heavy cream. Check out my post What to Do With Leftover Heavy Cream for storage tips and recipe ideas for the leftovers.
- Melted butter: The biscuits are brushed lightly with melted butter before baking to help a bit with browning and then again after they come out of the oven so you get plenty of buttery flavor. Salted or unsalted butter will work fine here.
How to Make Cream Biscuits
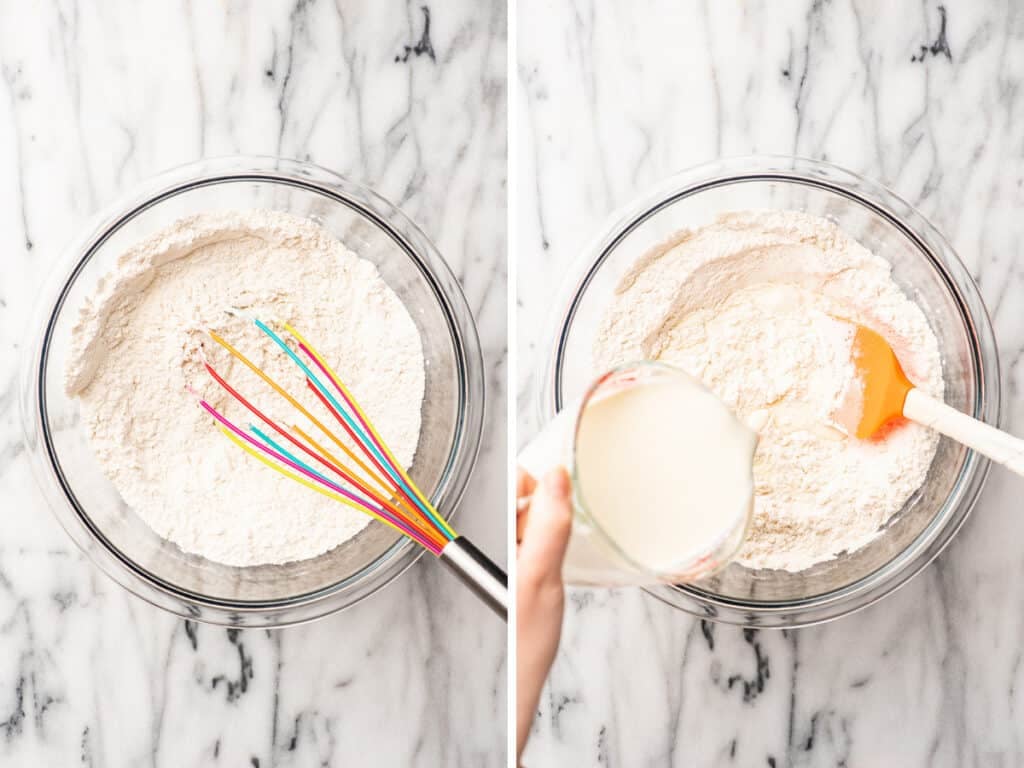
1. Mix the dry ingredients: In a large bowl, combine flour, baking powder, and salt. Whisk together until well combined.
2. Stir in the cream: Switch to a wooden spoon or silicone spatula and stir in the cream until a shaggy dough forms. Try not to over-mix, you just want to get to the point where no dry flour remains at the bottom of the bowl.
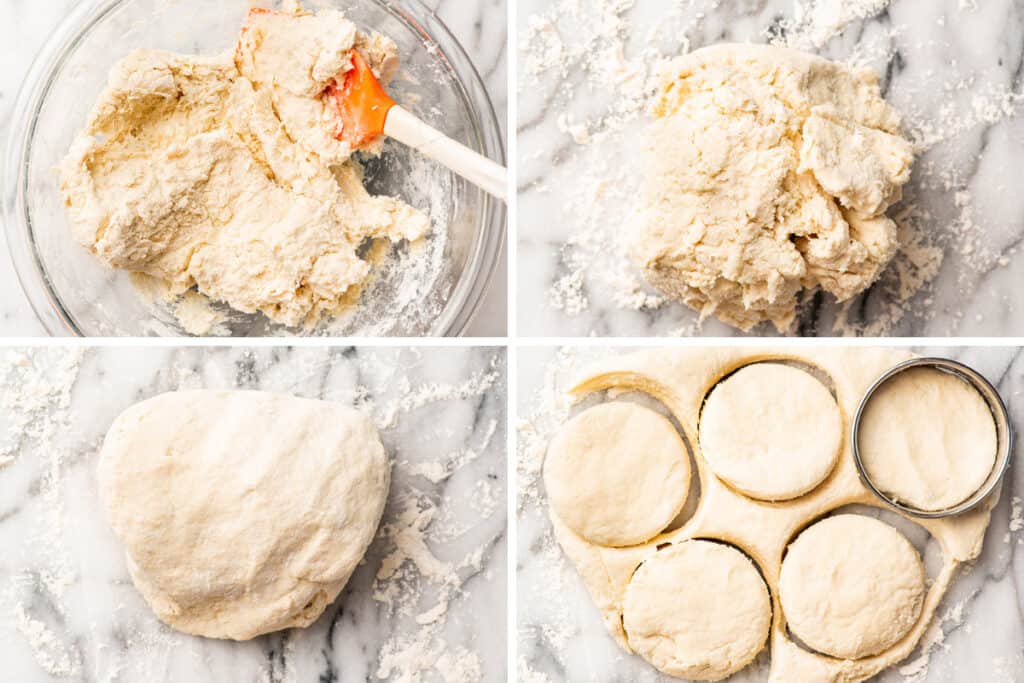
3. Knead: Turn the dough out on a lightly floured surface and knead the dough, folding it over on itself 5 or 6 times until the dough comes together, adding more flour if necessary. This is not only giving you a nicer dough to work with, but also adding some layers into your biscuits.
4. Cut out the biscuits: Pat the dough out to about 3/4-inch thick. Use a 2-to-3-inch biscuit cutter to cut the dough into rounds. Do not twist the biscuit cutter as this can seal the edges of the biscuits causing them not to rise to their full height.
After the first cutting, gather the scraps repeat to get 1 or 2 more biscuits out of the dough.
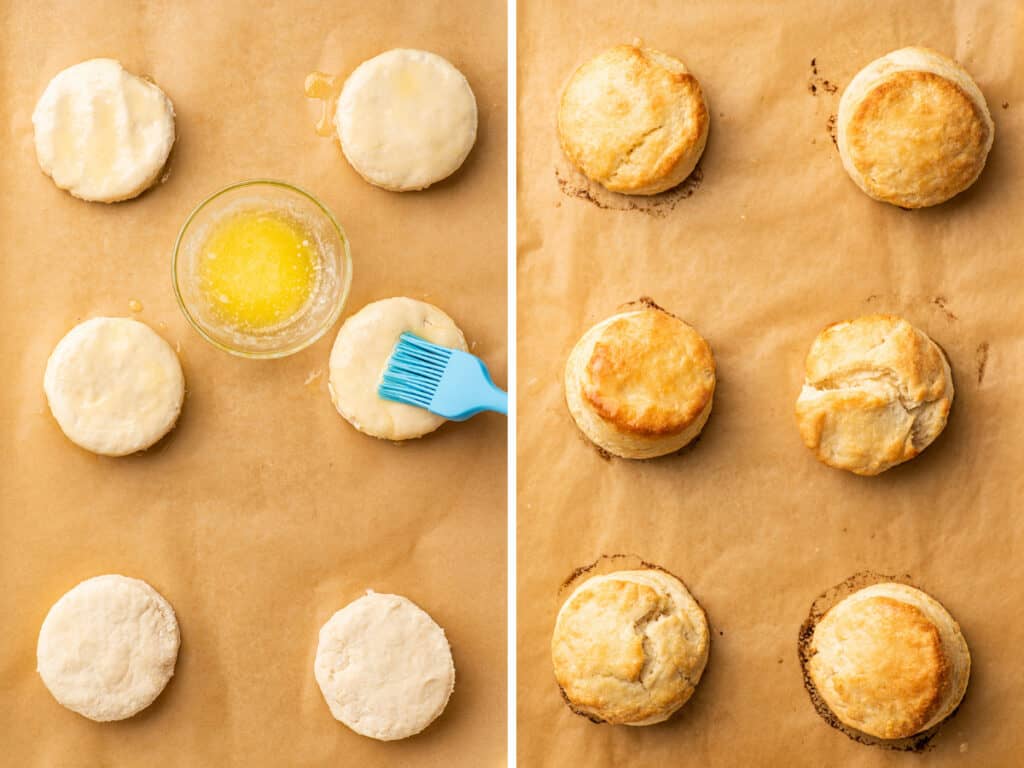
5: Brush with butter: Transfer the biscuits to your prepared baking sheet and brush the tops lightly with melted butter (reserve remaining melted butter).
Don’t go too heavy with the butter. You don’t want it to pool at the bottom edges of the biscuit because the milk solids in the butter can burn (you can actually see where I got a little too enthusiastic about the butter in the photo above). Stick to a thin layer on the top to help with browning.
6. Bake: Bake on the center rack of your oven for 11 to 14 minutes, until the biscuits are golden brown.
Transfer the biscuits to a cooling rack and brush them with the remaining butter. Serve and enjoy!
FAQ
Can I make a small batch of cream biscuits?
Yes! A half-batch of these biscuits is my very favorite way to make small-batch biscuits. Just cut the recipe in half (to change the recipe yield, hover over the serving size in the recipe card below or click if you’re on mobile, and slide the slider) and it will make 4 perfect biscuits.
To make things even quicker, instead of using a biscuit cutter, shape the dough into a square that is 3/4-inch thick, and then use a sharp knife to cut the dough into 4 even pieces. Transfer the biscuits to your baking sheet and they’re ready to go!
I don’t have a biscuit cutter. What can I use instead?
If you’re really attached to the idea of having round biscuits, you can use a 2 to 3-inch cup to punch out your rounds, but since cups don’t have a sharp edge, they can actually seal the edges of your biscuit so they don’t rise as high as they should.
What I recommend instead is using the method I described above for small batches, and just shaping your dough into a rectangle and using a sharp knife to cut your biscuits into squares. This way there’s no wasted dough and you get tall and fluffy biscuits.
What to serve with cream biscuits?
Cream biscuits pair perfectly with soup. Some of my favorites are:
Can these be made ahead of time?
Cream biscuits are best hot out of the oven, but can be reheated gently in the microwave or oven.
You can also make the dough up to 24 hours in advance. Store the cut-out biscuits tightly wrapped in the refrigerator. When you’re ready to bake them, the biscuits can go straight from the fridge to the oven.
Recipe Notes
- Yield: This will make approximately 10 2-inch biscuits or 6 to 7 3-inch biscuits.
- Parchment paper: Most parchment paper is only recommended for use up to 425°F. This is because above that, parchment paper can become brittle. That’s not really an issue with this recipe since it’s not cooking long enough for that to happen, but if you don’t feel comfortable using parchment paper at this temperature, you can also lightly grease your baking sheet with cooking spray instead.
Biscuit cutters: Use 2 to 3-inch biscuit cutters for this recipe. I used a 3-inch cutter for the biscuits in the photos.

20-minute Cream Biscuits
Equipment
- 2-to-3-inch biscuit cutter
Ingredients
- 2 cups (260g) all-purpose flour plus more for dusting, measured by weight or using the spoon and sweep method*
- 2½ teaspoons baking powder
- 1 tablespoon (12g) granulated sugar
- ¾ teaspoon salt
- 1½ cups heavy cream
- 2 tablespoons melted butter optional
Instructions
- Preheat your oven to 475°F and line a baking sheet with parchment paper.
- In a large bowl, combine flour, baking powder, sugar, and salt. Whisk together until well combined.
- Switch to a wooden spoon or silicone spatula and stir in the cream until a shaggy dough forms and no dry flour remains at the bottom of the bowl.
- Turn the dough out on a lightly floured surface and knead the dough, folding it over on itself 5 or 6 times until the dough comes together, adding more flour if needed.
- Pat the dough out to about ¾-inch thick. Use a 2-to-3 inch biscuit cutter to cut the dough into rounds. After the first cutting, gather the scraps and repeat to get 1 or 2 more biscuits out of the dough.
- Transfer the biscuits to your prepared baking sheet and brush the tops lightly with melted butter (reserve remaining melted butter).
- Bake on the center rack of your oven for 11 to 14 minutes, until the tops of the biscuits are golden brown.
- Transfer the biscuits to a cooling rack and brush them with the remaining butter. Serve and enjoy!
Notes
This post may contain affiliate links, which means I receive a small commission if you make a purchase using them. There is absolutely no additional cost to you.


Lyn says
Quick n easy a great way to use heavy cream. Will make again. Brushed it with cinnamon butter.
Tracy says
Ooooo adding cinnamon butter sounds dreamy!!
Jennie says
These are so quick and easy to make….and the best tasting biscuits I’ve ever made. This will be my go-to recipe for biscuits from now on!
Kayla says
These biscuits are so delicious! We’ve made them twice already. Great recipe for when I’m short on butter. Perfect and easy biscuit recipe to go with jam, honey butter, or gravy!
Katrina says
Super easy recipe, excellent results.
Rather than using a biscuit cutter, I patted the dough into a rough square and used a serrated knife dipped in flour to cut square biscuits.
Thanks for a keeper recipe!