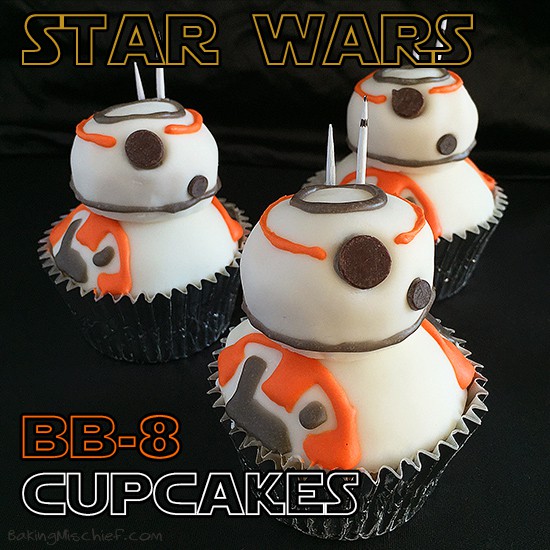
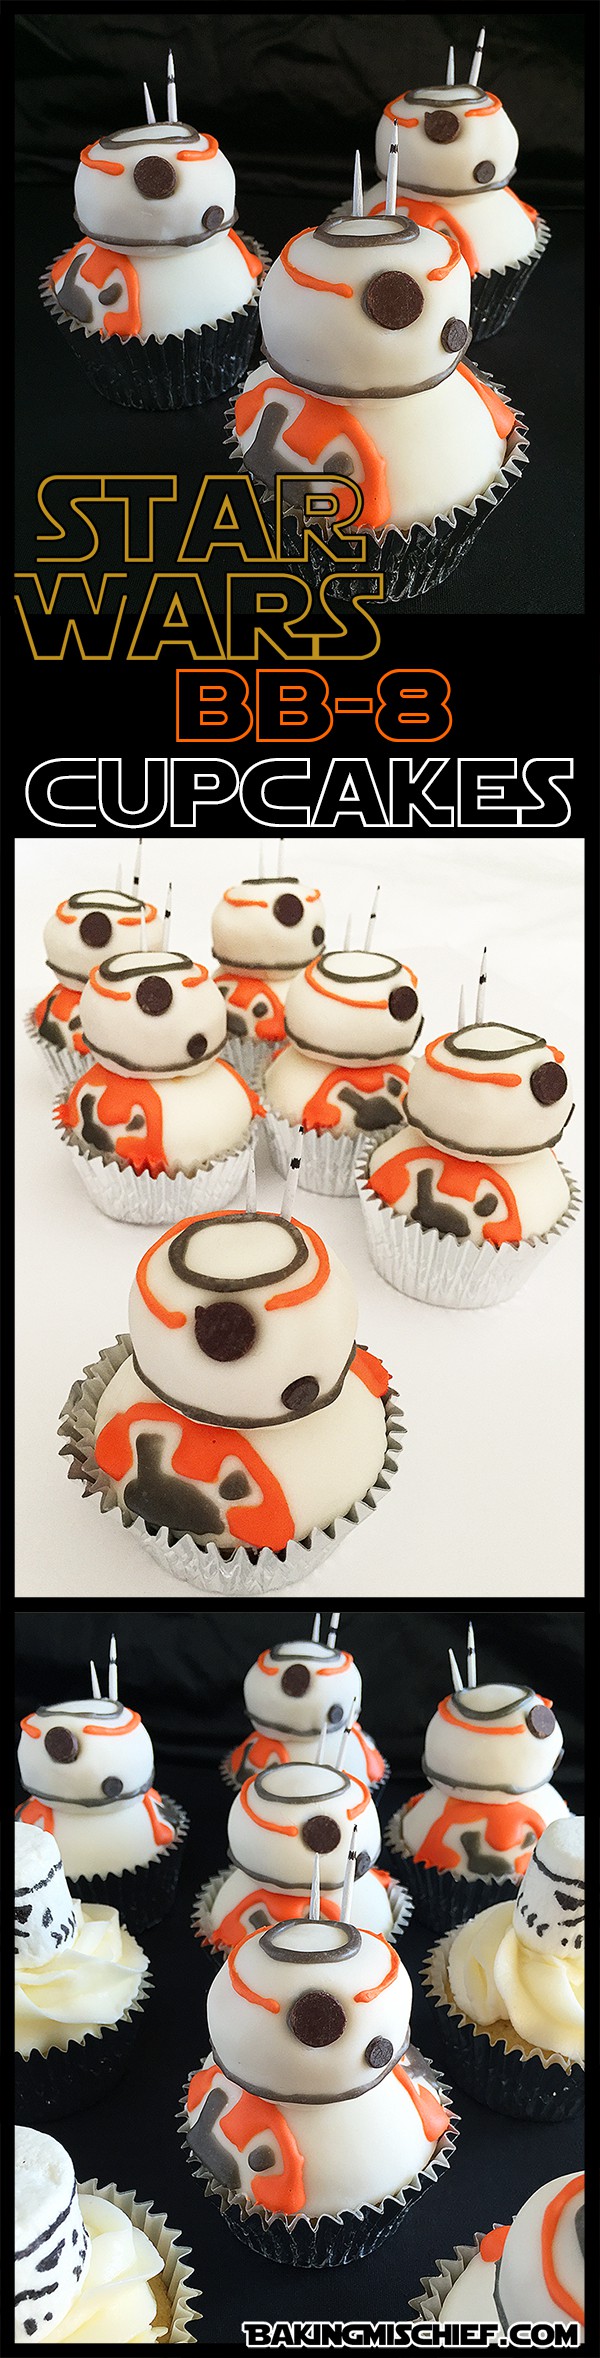
These are the droids you’re looking for! Adorable and easy(ish) Star Wars BB-8 cupcakes that anyone can make.
So, you probably haven’t heard, but there’s a new Star Wars movie coming out this month. I know, crazy. You’d think we’d have seen at least a little advertising. She says, trying to keep a straight face.
Are you excited? I’m excited.
I went through a massive Star Wars phase growing up. My first crush was Han Solo, I had a Star Wars-themed tenth-birthday party. I thought the third movie was the most romantic thing ever. I was a weird kid.
As an adult, I was sure my love for space operas had waned in the years in between, and then that full-length Star Wars: The Force Awakens trailer dropped and ten-year-old fangirl Tracy came roaring back to life.
There was space friendship, grown up Leia and Han, and the cutest droid you ever did see, and I lost my mind a little. Let’s just say, my tickets are bought, and my butt will be in a theater seat come opening weekend.
So, in honor of my very first fandom, I wanted to do something Star Wars-themed for the blog. BB-8 seemed the perfect candidate, given that she is the break-out star of the trailers (and that she is mercifully free of all the angles and fur of the other characters). She was basically just begging to be turned into a cupcake!
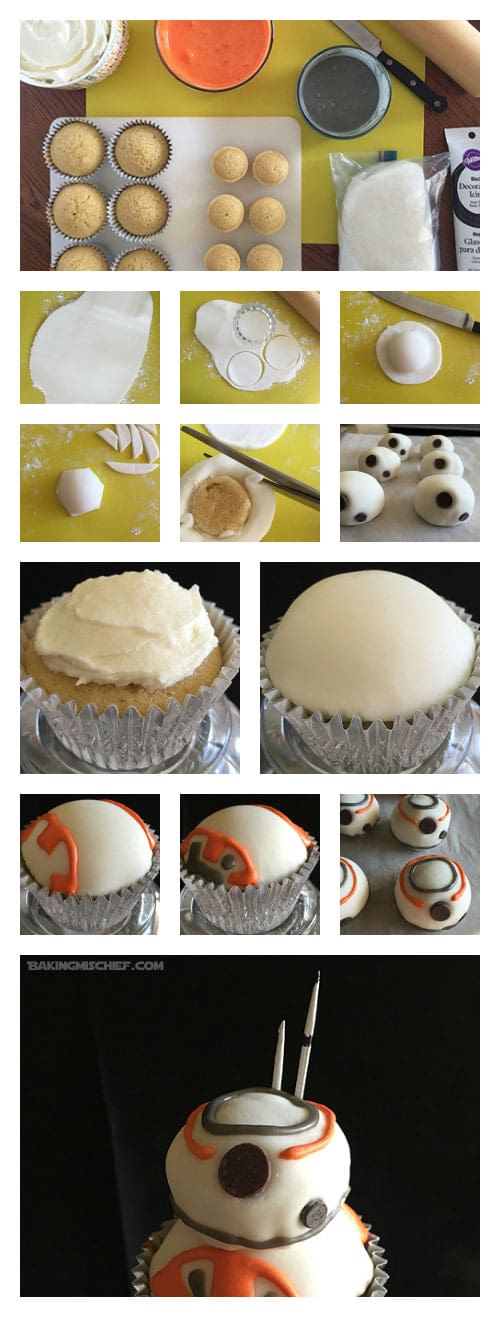
This was such a fun project. I’ve only worked with fondant once before and that was to sculpt Smauglock for a gingerbread house a couple of years ago (more on that another time). I wasn’t sure how covering the cupcakes and decorating them would go, but it ended up being super easy. If I can do it, anyone can make these cupcakes!
These BB-8 cupcakes can be as homemade as you want. I made my fondant, royal icing, and cupcakes, but you can also buy everything to save time. I’ve actually seen fondant at my local Vons lately, so you might be able to get everything in one trip to your grocery store.
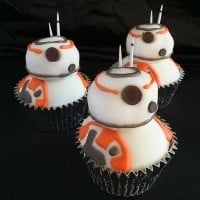
Star Wars BB-8 Cupcakes
Ingredients
- 12 cupcakes in white or silver liners - I used a double batch of Martha Stewart's Vanilla Cupcakes
- 12 mini cupcakes - See above
- 24 ounces white frosting - I used Savory Sweet Life's Buttercream Frosting
- 16 ounces fondant - I used The Bearfoot Baker's Easy Fondant
- Corn starch for dusting powdered sugar will also work in a pinch
- inch 3-inch biscuit cutter or glass
- 12 chocolate chips
- 12 mini chocolate chips
- Royal icing in orange and silver/grey - I used Cake Wiz's Royal Icing
- A piping bag w/ small tip
- 12 white toothpicks cut in half and black tips colored on in sharpie
Instructions
Prep
- If your mini cupcakes baked up so tall that they look too large for your bases, cut a bit off their bottoms, until they look appropriately head-sized. Set aside and make sure your work surface is crumb-free before you roll out your fondant.
- Sprinkle your work surface with a bit of corn starch and knead the fondant until it is pliable and easy to work with. If you are using marshmallow fondant, a quick 5-10 seconds in the microwave can help speed things along. Just be careful. If left in too long, it will be HOT.
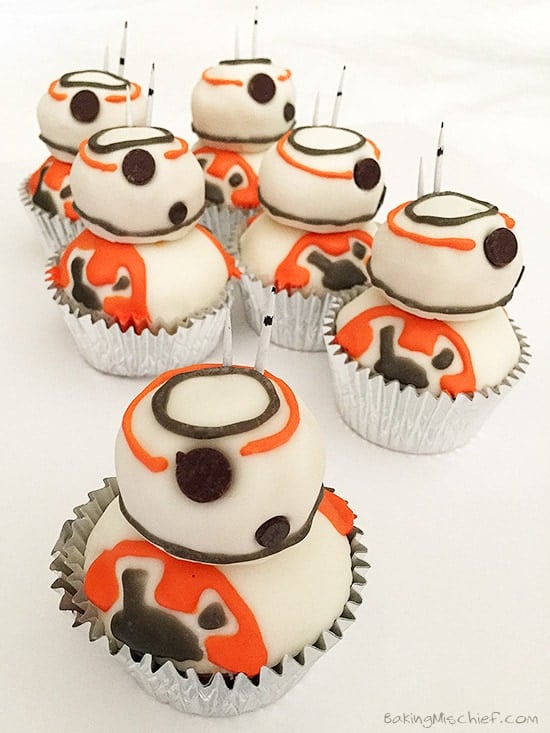
Covering the Cupcakes
- Start with the heads. Because my fondant was a little dry, I rolled, cut and attached the fondant to the mini cupcakes a couple at a time. If your fondant is holding up well, go ahead and cut out all twelve at once. When your fondant is not in use, make sure to keep it in an air-tight container.
- Roll out fondant slightly thinner than 1/8 inch thick and cut out your three-inch disks. Take the mini cupcakes one at a time, frost the entire thing (sides includelightly and lay a fondant disk over it. Carefully, smooth it down so there are no folds or bubbles. Cut the excess, leaving a little space around the edges and then pick up the covered mini cupcake and, using scissors, trim the rest of the excess.
- Press a chocolate chip into the top half of the head for the eye and a mini chocolate chip to the lower right. Use a little bit of royal icing in the socket to secure them. Complete the rest of the heads and set aside.
- Roll the remaining fondant to 1/8-inch thickness and cut into 12 three-inch rounds.
- Spread frosting on top of each large cupcake. Your layer can be as thick or as thin as you'd like it, but make sure not to put a heavy coat around the edges or the frosting may squeeze out. Cover frosting with the fondant and smooth. If your cupcakes don't have a huge dome on them and your fondant is too large, just cut it down with clean scissors (alternatively, you could just pile more frosting underneath to fill up the extra space). Finish all of the cupcakes and set aside.
Decorating
- Using a piping bag and a small tip, pipe the orange designs on the base and head. I found it helpful to use a toothpick in the head and spin it as I piped the lines. You can get as complex as you'd like.
- Switch to silver and pipe the insides of the gears and finish the head. Insert the toothpicks/antennae into the heads and let sit until the icing is dry (it won't take long). Dab a little frosting or royal icing where you want to attach the head. Place the head on the body and you are done!
Notes
Good luck and if you have any tips/tricks for working with fondant or Star Wars memories/nerdgasms to share, please do so in the comments below!
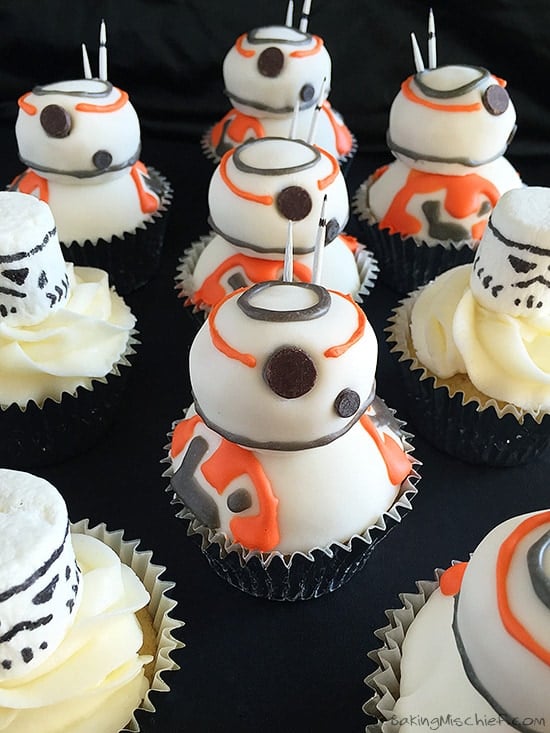
Looking for more Star Wars Treats?

Check out my Poe’s Jacket Star Wars Cookies with Printable Stickers!


