Quick and easy instructions for cooking perfectly juicy and tender chicken breasts for salads and sandwiches.
Boneless skinless chicken breasts are a great cut of meat. They’re lean, healthy, versatile, but they can be surprisingly tricky to cook.
If you’ve ever struggled with cooking chicken breasts on the stove, maybe your chicken always comes out dry or the outside burns before the inside is cooked through, friend, this is the recipe for you.

Cooking the perfect chicken breasts on the stove is actually really, really simple.
You just need the right tools and the right method, and your chicken will come out juicy, moist, and perfectly cooked every single time.
Tools & Ingredients
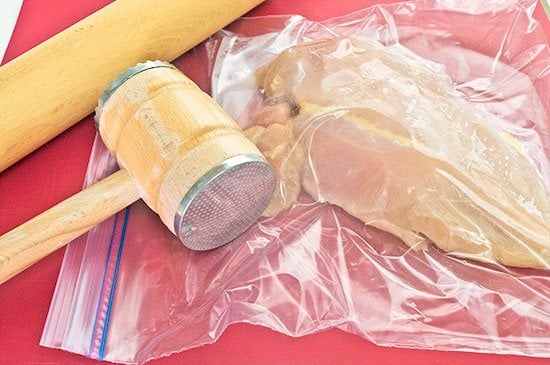
- Meat mallet: The secret to perfectly cooked chicken breasts is to pound them to an even thickness before cooking. You can use a rolling pin, or even an empty wine bottle to do this, but a meat mallet will work best.
- Instant-read thermometer: Using an instant-read thermometer takes all the guesswork out of cooking meat so you can pull your chicken from the stove at exactly the right moment. You can cook chicken without one, but if you cook meat regularly, go buy a thermometer. It will change your life!
- Cling wrap or gallon plastic bag: Pounding chicken to an even thickness can be messy work, so you want to cover the chicken with either plastic wrap or enclose it in a plastic bag (with a small bit left open at the top for air to escape) before starting.
- Boneless skinless chicken breasts: Chicken breast sizes vary wildly, so don’t be alarmed if your chicken seems to be taking longer to cook than expected. You’re probably just working with a larger piece of meat.
- Spices: You’ll be surprised at how good this chicken is flavored with just salt and pepper, but you can get creative with the spices to add extra flavor. Italian seasoning and taco seasoning both work well.
How to Cook Moist Chicken Breasts for Salads and Sandwiches
1. Start with completely defrosted chicken breasts. (Have frozen meat you need to defrost quickly? Read this.) Never try to cook half-frozen breasts on the stove.
They won’t cook evenly all the way through, and that’s how you end up with raw insides and over-cooked outsides. Plus, if your meat is still frozen, it’s going to make the next step nearly impossible…
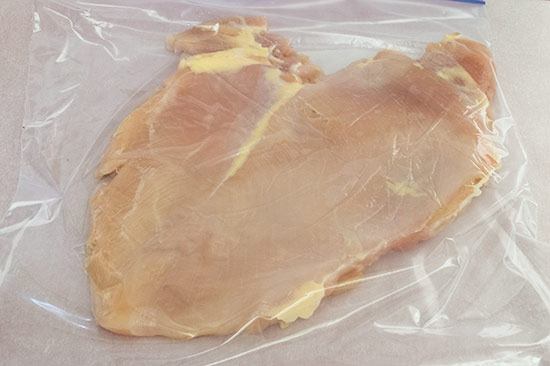
2. Pound your chicken breasts to an even thickness. This is the secret to tender, moist chicken breasts! Meat that is all the same thickness is all going to cook at the same rate, so you aren’t going to get parts that are over-cooked and dried out.
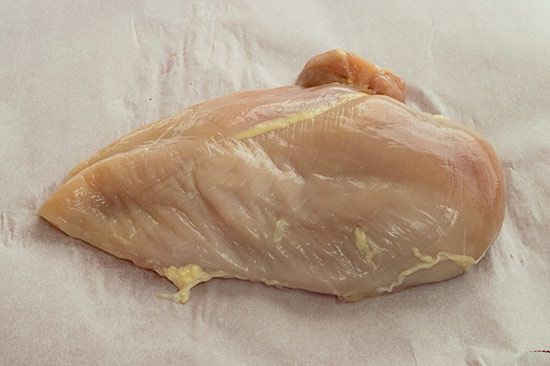
Place your chicken breast smooth-side up between two layers of plastic wrap or in a large disposable plastic bag (my preferred method) and go to town. Start with the thickest part of the meat and strike it, working outward until the breast is the same thickness all over.
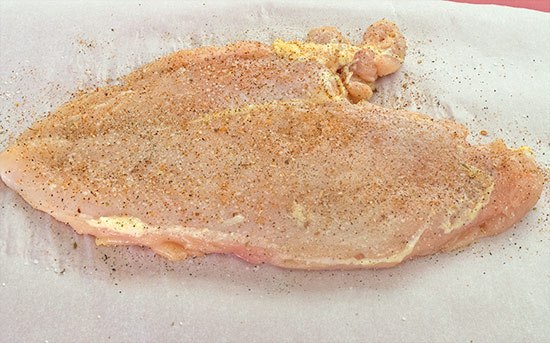
3. Marinate or season your chicken breast before it goes on the heat. If you’re marinating, now’s the time for it. If the chicken is not being marinated, at the very least, salt and pepper that thing before putting it on the heat.
Even better, get creative and sprinkle on some of your favorite spices. Is it going in a Mexican salad? Use some taco seasoning. An Italian sandwich? A little basil and oregano would be perfection.
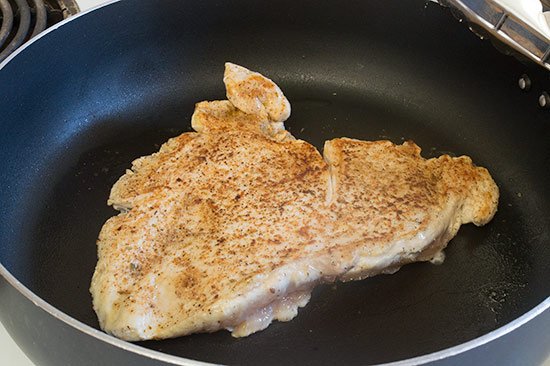
4. Start with a hot pan over medium-high heat. Spray with cooking spray and add your chicken to the pan. You should hear a sizzle when it hits the heat. Cook your chicken until it is nice and brown on the first side, 5-8 minutes, and then flip. Continue to cook until done, flipping again if necessary.
If at any time your chicken starts to brown too much, turn down the heat a bit and let it cook at a lower temperature.
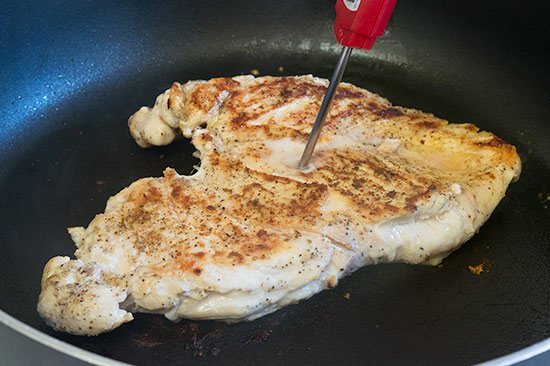
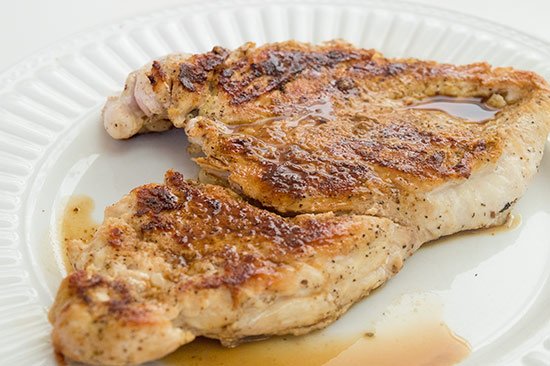
5. Use a meat thermometer. As soon as an instant-read thermometer inserted into the middle of your chicken says 165 degrees, pull it. It’s done! Set on a plate, tent with foil and let sit for at least five minutes before cutting.
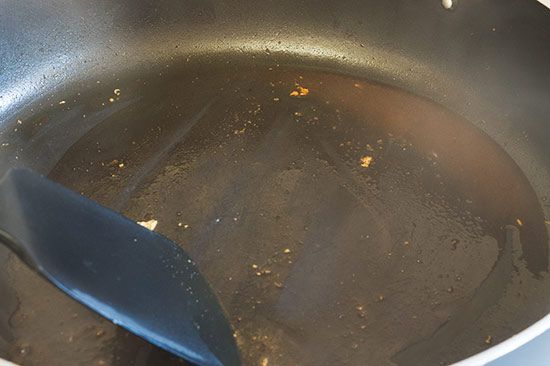
6. (Optional) Deglaze the pan with a couple tablespoons of white wine or chicken broth (or water, if neither is handy). Return the pan to heat, add liquid and scrape the black bits and juices off the pan. Pour back over the chicken breast while it rests.
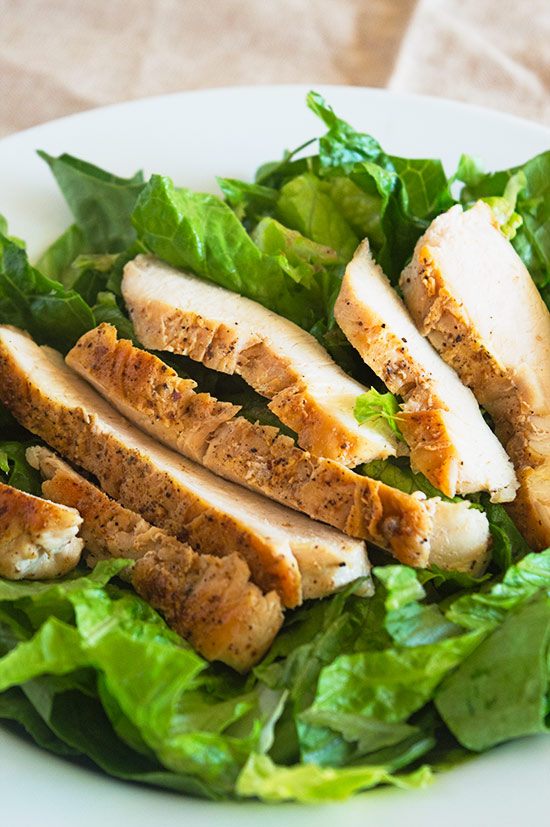
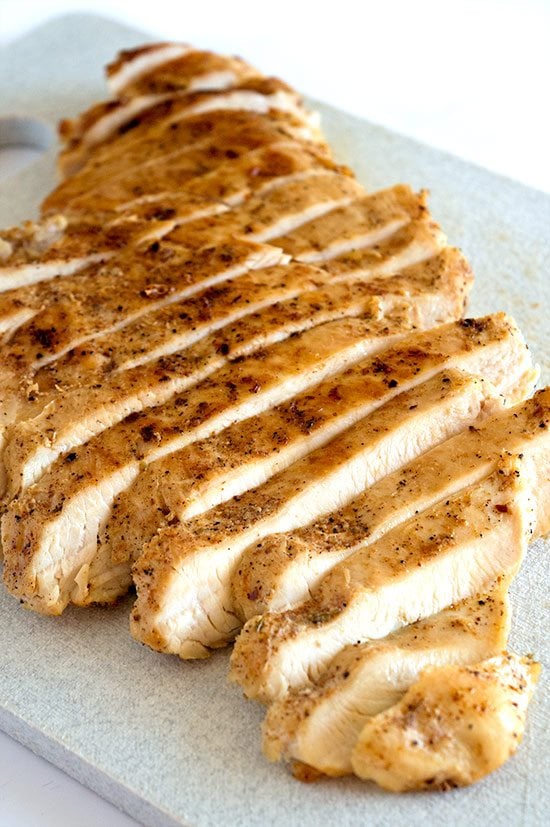
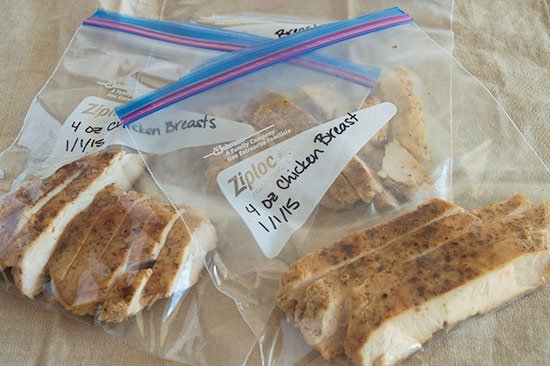
7. Slice and enjoy that perfectly cooked chicken breast on a salad or in a sandwich! Chicken will keep in the refrigerator for 3 to 4 days or can be frozen in individual portions (read below for freezing instructions).
FAQ
Does this work with boneless skinless chicken thighs?
Yes! This method works well with boneless skinless chicken thighs, but with thighs you don’t need to pound them thin first since they’re already pretty thin to begin with.
Just season the thighs with salt and pepper and cook them according to the recipe instructions. They’ll require a significantly shorter cooking time, usually 3 to 6 minutes per side, so keep a close eye on them to make sure they’re not overcooking.
Will this work with chicken fillets/chicken cutlets?
Yes. This will work with any boneless chicken breasts. If your fillets/cutlets are already an even thickness all the way through, you can just skip the pounding part of the recipe and start cooking them.
Can I freeze cooked chicken for later?
Yes. Chicken will keep in the freezer, in an airtight container or freezer bag for up to about 3 months.
To eat, defrost in the refrigerator. You can also defrost the chicken by putting it in the microwave for 1-2 minutes, sprinkled with about a teaspoon of water.
Can I make this ahead of time?
Absolutely. Cook the chicken for your salad today and you can store it in an airtight container (with the pan drippings if you deglazed the pan) in the fridge for 3 to 4 days.
What To Make With Cooked Chicken
Here are a few of my favorite recipes made with chicken cooked using this method:
- Pesto Chicken Sandwich on Sourdough
- Asian Chicken Salad
- Garlic Chicken Cobb Salad
- Fettuccine Alfredo for One
More Chicken Tutorials
- Roasted Chicken Guide
- How to Cook Chicken Shredded Chicken
- How to Cook Chicken Breasts
- How to Make Chicken Stock

How to Cook Perfect Chicken Breasts for Salads and Sandwiches
Ingredients
- Boneless skinless chicken breasts
- Salt
- Pepper
- Seasonings or marinade of choice
Instructions
- Start with completely defrosted chicken breasts.
- Pound your chicken breasts to an even thickness by placing your chicken breast smooth-side up between two layers of plastic wrap or in a large disposable plastic bag (my preferred method) and go to town. Start with the thickest part of the meat and strike it, working outward until the breast is the same thickness all over.
- Marinate or sprinkle both sides of your chicken with salt, pepper, and your preferred spices before it goes on the heat.
- Heat pan over medium to medium-high heat, grease with cooking spray or a drizzle of oil, and add your chicken to the pan. Cook for 5-8 minutes per side. Turn heat down if chicken begins to burn.
- Use a meat thermometer to check the temperature of your meat. Pull the chicken breast when it reaches 165 degrees and allow to rest for at least 5 minutes.
- Deglaze the pan with 2 tablespoons of white wine, chicken broth, or water and pour back over chicken.
- Slice and enjoy!
Notes
This post contains affiliate links, which means I receive a small commission if you make a purchase using them. There is absolutely no additional cost to you.


Sarah says
This turned out so good!! Thank you. Very easy and delicious.
Tracy says
Thanks, Sarah!!
Lonnie Graham says
Great recipe, thank you.
Another good way, is to put chicken breasts, as is, in a saucepan, cover with water/stock etc. Bring to simmer, simmer for 5 minutes, then place lid on tightly and let sit for 20 minutes. Perfect juicy every time. Coating beaten, or very thiinly sliced in egg and seasons flour is also a lovely option.
Rebecca Hansen says
Oh my gravy!!!!! This is the best method for cooking chicken breasts I’ve ever tried. Mine always come out dry with no flavor. I followed your directions exactly. I beat the heck out of those chicken breasts and added salt, pepper, onion powder, and garlic powder. It turned out absolutely delicious. Very tender and juicy. The flavor is amazing. I cannot thank you enough! You ma’am are a genius.
Tracy says
This makes me so, so happy to hear!!
Corine Harvey says
What seasonings did you season your chicken with? Any sugesstions for chicken that is being put on a regular caesar salad!
I can’t wait to try this recipe!
Tracy says
I usually just use salt and pepper, but sometimes I really enjoy adding Italian seasoning as well (or a combo of basil and oregano). Hope you enjoy it!!
Mallory says
Absolutely delicious. I ate almost all of it after Slicing it. Oops. I deglazed with white wine and used Italian seasoning, salt and pepper. One thing I did learn, turn the heat down before throwing in the wine. It all splattered up on me and the entire kitchen! Haha
Tracy says
Oh no! Glad you enjoyed the chicken, but sorry to hear cooking it was a little more exciting than expected!! 😉
Jerry Morrison says
Trying to eat healthier so I’m definitely going to try this. A couple of questions though:
1) Do you heat your pan and then spray or spray first and heat the sprayed pan?
2) What is the whole “tent with foil” all about?
These are probably basic but I’m pretty new to cooking.
Tracy says
Hi, Jerry, sorry for the late response!
1) Heat first and then spray.
2) Tenting with foil is optional, but it will keep your chicken hot if your salad/sandwich prep takes longer than expected and your chicken is sitting off the heat for a little while.
Hope this helps, and good luck with your cooking journey!
Devon says
Hey Tracy!
I am new to the kitchen and I am going to be trying this soon. My husband and I can’t seem to get the chicken right. I’m sure we are drying it out, but it also seems like a bad cut ( like it’s chewy) and we end up throwing it out. I’m hoping that this will fix that because we have pretty much cut chicken from our diets unless we go out to eat. Will this help with the rubbery feeling chicken has? Should I brine the chicken? I need help bringing chicken back into our home.
Tracy says
Hi, Devon, this method should definitely help. I’d give it a try and see how you like it. But some of the chicken on the market these days does seem to just be poorer quality and chewier, especially if you buy those really monster-sized breasts that are usually the best price. I’ve started buying organic when possible and have had better luck with texture.
You might also try switching to thighs if you still aren’t enjoying the chicken breasts. They’re much harder to overcook, and cook up beautifully on the stove. Hope that helps!
Devon says
I am making the chicken right now. My husband and I tried a bite and it’s night and day to how our chicken was before! So excited to be eating this as southwest chicken salad this week! Thank you for your help!
Tracy says
Thanks for the update, Devon! This makes me so happy to hear!!
Cj says
Thank u for your recipe. It sounds simple enough but I must be doing something wrong or I just don’t have the cooking gene! I followed the instructions but mine over cooked on the outside and the inside barely reached 140 degrees. I turned down the heat ( I have a gas stove) and finished cooking the last piece maybe it will turn out better…
Karen says
Thank you so much for the recipe! Just tried and they turned out perfectly!! I pounded the breasts to about 1/2″ thick, seasoned with salt, pepper, garlic powder and onion powder. They only took about 6 minutes total to cook. They are moist and perfectly seasoned! Thank you!!
Tracy says
Thanks, Karen! I’m so glad it worked for you!!
Chris says
Was constantly overcooking boneless breasts and getting frustrated. Invested in a good instant read thermometer and followed your recipe for cooking. Have used Italian spices as well as Mexican and I must say that both turned out Awesome!! I have a good sized family at home, so I make a large batch and slice and refrigerate after the first meal. Gone very quickly 🙂 Thank you so much!!
Tracy says
Thanks, Chris! I’m so happy to hear this has been useful for your family!
carol bryan says
happy to have found your website & the chicken recipe. Lots of good ideas
Tracy says
Thanks, Carol!!
Becky says
Wow! I’m so glad I found this recipe! I had given up on cooking chicken because it never turned out great but I wanted to make chicken and broccoli pasta alfredo so before cutting the chicken up into chunks and cooking it on the stove like I normally would I looked online to see if I could find a way to not make it dry and bland. I do not consider myself a good cook at all but this recipe looked so very simple that I figured maybe I could pull it off and I did!! The chicken was perfect! It tasted like it came from a restaurant! Thank you so much for a fantastic recipe!
Tracy says
Yay, SO happy this post was helpful to you, Becky!
Bob says
Just made this tonight came out great nice and moist cooked perfect..thank you im glad i followed your receip and not the others i was looking at…came out perfect except i marinated it with seasoning olive oil and some lemon juice in a ziploc in fridge for about 2 hours…thanks again
Tracy says
I’m so glad you enjoyed it, Bob! Love the simple marinade idea!
Laurie says
There are two temperatures listed in the post. In the description with the photos, it says to pull the chicken off the heat @ 165, and in the recipe itself, it shows 160. Which internal temperature should it be?
Looking forward to buying my first instant-read thermometer!
Tracy says
Oh, thanks for pointing that out! Either is actually fine. If you cook the chicken to 160 degrees, the temperature will rise to 165 during the resting period. Lately I’ve found myself preferring the texture of chicken cooked to 165 so if finishes slightly higher, but the difference is subtle, so you really can’t go wrong with either.
And yay for your first instant-read thermometer! You will never know how you lived without it!!! 😉
Tyra Rae says
Me again, lol
Can I just slice the chicken breast in half horizontally instead of pounding it – to make the chicken thinner?
It arrived!
I purchased via mail a mallet to pound the chicken (I didn’t get wooden handle like you recommended)
It turns out that:
– one side is flat
– the other side is not smooth (not needle like)
– then the head has this screw cap that is un-screwed then reversed…that part looks lethal because that has long needle – like spikes— eek!
Which section do I use to pound the chicken?
– the flat side or the not so flat side? (I’m positive I’m not to use the needle – like spikes ~ those are scarey lol)
And a third question if you don’t mind
I’ve been really enjoying
Baking your muffin recipes
My family have loved each batch
My question is
In one of the muffin recipes
You said
Where the recipe was doubled that instead of using 2 egg whites
it would be okay to use an entire egg instead of using 2 eggs whites
is this okay to be done
whenever I double any of the muffin recipes
that in the single serving asks for only 1 egg white?
Geesh, I hope that made sense & that I was written clear enough to explain what I’m asking.
I’m so green in the kitchen
(* If there’s a place to nominate “Blogs with tastiest revipes” I’d nominate you hands down)
Thank you for sharing your food knowledge.
You definitely rock!
Tracy says
Sorry this reply is late! This one got buried.
For the meat tenderizer, use the flat head.
For the muffins, *usually* using and entire egg instead of two egg whites works just fine. But unless I specifically say it in the recipe notes, I haven’t tested it with that recipe, so I can’t guarantee it.
Hope that makes sense!
And thank you so much!!
M says
How would you known if the chicken is cooked without a thermometer
Tracy says
If you don’t own a thermometer, you can cut into the chicken. There should be no pink, the juices that come out should run clear, and you should be able to pull the meat apart a bit with a fork.
Alta says
I’m able to buy chicken filets that are thin and don’t need any pounding. They’ve always turned out great. Have also used them to make stuffed chicken (either brocolli or spinach with cream cheese)
Tracy says
That sounds delicious, Alta!!