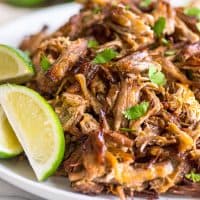
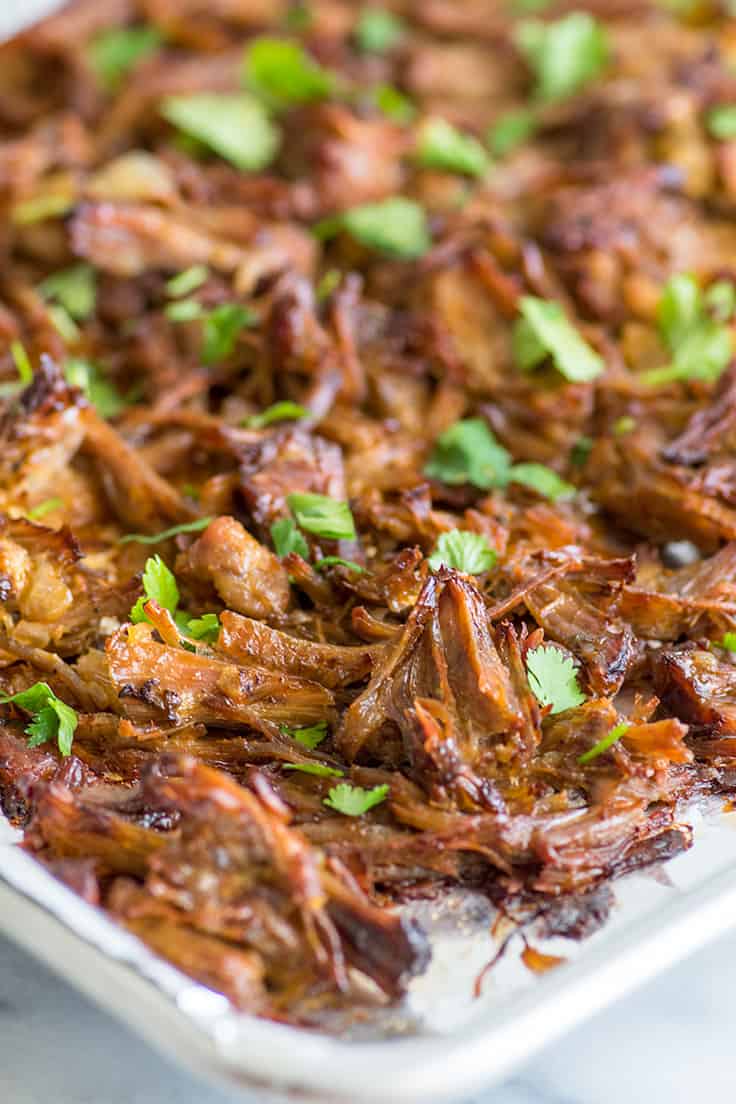
This Easy Carnitas Recipe makes amazing carnitas: rich, tender shredded pork with crispy, crunchy edges, perfect for tacos, burritos, or just eating by the forkful. The post includes step-by-step instructions and everything you ever wanted to know about making carnitas.
Okay, you all know that I love every recipe I share here, but there are some that I get extra excited about sharing. My Oven-roasted Tri-tip was one (and it has been incredibly pop
ular). My Freezer Meatballs were another (these have not been popular at all, people, go fall in love with them!!), and today I have another recipe I’m really excited about: carnitas!!!
Have you ever made carnitas? Have you ever eaten carnitas? Because, friend, They. Are. So. Good.

What are carnitas?
Carnitas translates literally as “little meats.” It’s a Mexican dish made by braising pork until it yields fall-apart tender meat which is then cooked over high heat to make the outside crispy and delicious.
The result is fantastically rich shredded pork that manages to be both tender and have all sorts of crispy, crunchy bits. It’s the type of meal you’re going to want to share, not just because it tastes great (and makes a ton), but because it makes you look like a genius cook.
You bring these carnitas to one potluck or serve them at one party, and I *guarantee* you will have people asking you for the recipe and talking wistfully about them months later.
Ingredients
- Vegetable oil: Traditional carnitas recipes use lard as their cooking fat, but we’ll use vegetable or canola oil today.
- Pork shoulder roast: The best cut of meat for carnitas is pork shoulder AKA pork butt AKA Boston butt because it is well-marbled with fat and cooks up incredibly tender with a long braise.
- Large onion: A yellow, white, or red onion all work here.
- Lime juice: Just a bit of lime juice gives the pork a slightly tangy flavor.
- Garlic and spices: Garlic and a mix of chili powder, oregano, and cumin help to flavor the pork as it braises.
- Chicken broth: Using chicken broth as our braising liquid instead of water also helps boost the flavor of the pork as it cooks.
A Note on Bone-in vs Boneless Pork Shoulder Roasts: You’ll probably find both bone-in and boneless pork shoulder roasts at your grocery store. Either one works just fine for carnitas, but if you have a choice between the two at a comparable price, go with the boneless roast. The bone-in roasts have a Y-shaped bone that is a bit of a pain to get out cleanly.
If you do end up with a bone-in roast, the good thing is that they are so large and inexpensive that you don’t have to worry too much about getting every single last piece of meat off the bone. Just use a sharp knife (a boning knife if you own one) and slice the meat away from the bone as best you can until you are able to remove it. Don’t stress too much about it. Here’s a good video of someone doing a much nicer job of removing the bone than I usually manage.
Preparing Pork Shoulder for Carnitas
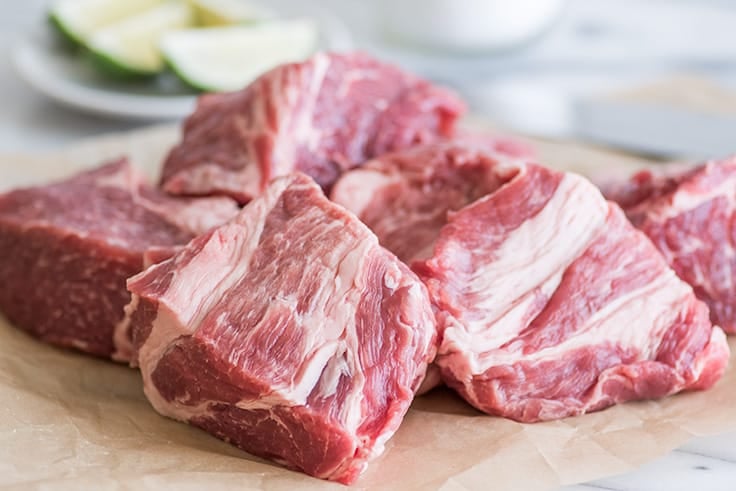
As mentioned, pork shoulder is a pretty fatty piece of meat. Before cooking, you’ll want to remove the large fat cap (the thick layer of fat on one side of your roast) and cut away any silver skin (the thin, silvery blue membrane that sticks closely to the meat). Don’t worry about the smaller bits of fat marbled throughout the meat. Any fat that remains after braising can be picked out while shredding.
Then you just cut your roast into large chunks about the size of a lady’s fist, and you’re ready to start cooking.
PS: Don’t worry if your chunks don’t look pretty or are not completely even in size. You’re going to shred that pork so no one is ever going to know.
How to Make Carnitas
There are three stages to making carnitas. Stages two and three are pretty hands-off, but step one will require your full attention, so make sure you have all your ingredients prepped and ready to go before you begin.
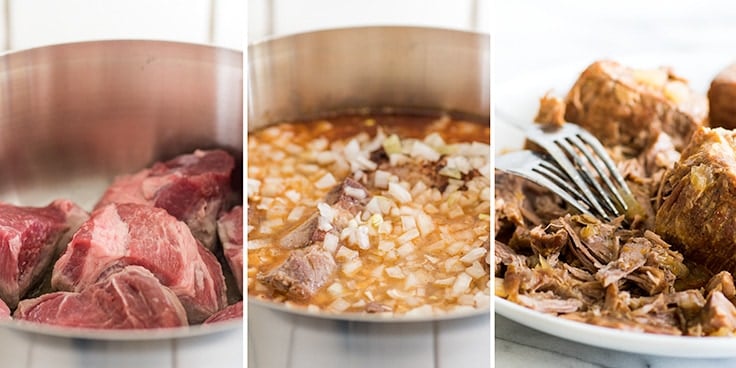
- Salt and brown the meat. Depending on how large your roast and Dutch oven are (this is the Dutch oven I always use for carnitas), you might need to do this in batches. You’ll want to brown all sides of your meat, so don’t crowd the pan too much, and this may take up to 15 minutes.
- Long, slow cooking time. After your meat is browned, you’ll add the onions, garlic, spices, lime juice, and enough chicken broth to mostly cover the meat. That all simmers covered for about two and a half hours, until your meat is tender enough to pull apart with a fork.
- Make it crispy. This is my favorite part. Now that your meat is nice and tender, you get to make it crispy too. You shred the meat, transfer it to a sheet pan, and let it crisp up in the oven at a high temp for 30 minutes, occasionally adding a little cooking liquid to keep it from drying out. As soon as you’ve got enough crispy edges for your liking, it’s done and you get to eat!
FAQ
What to serve with pork carnitas?
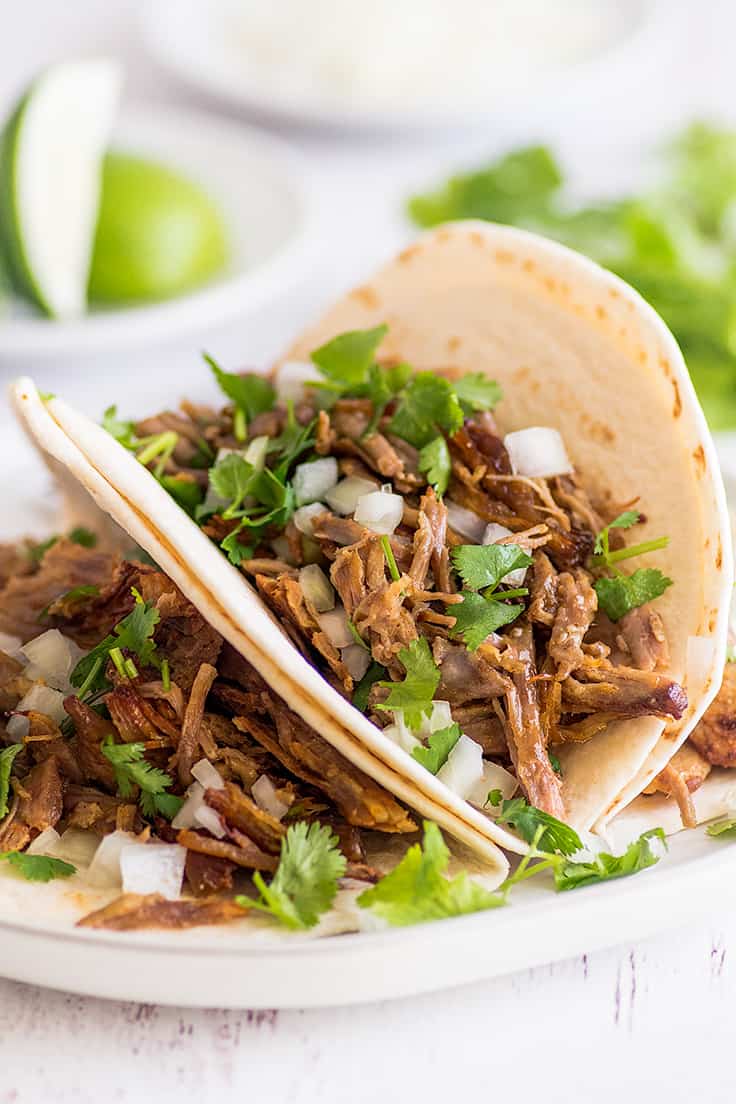
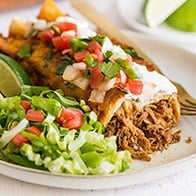
Carnitas are super versatile. You can serve them in Carnitas Tacos, tostadas, or make sliders with them. Adding them to nachos, a salad, or made into Carnitas Enchiladas is also highly recommended.
For sides, as with something like Beef Stroganoff or Braised Short Ribs, Carnitas are so rich that you probably want to stick to sides that aren’t too heavy. Something like Cilantro Rice, Skillet Mexican Zucchini, Mexican Coleslaw, Corn and Black Bean Salad or Mexican Street Corn Salad would be perfect. And when in doubt, you can never go wrong with simple universal sides like Green Beans or Steamed Broccoli.
What to do with leftover carnitas?
Store leftover carnitas in an airtight container in the refrigerator for up to 3 days. Drizzle with a couple extra tablespoons of the cooking liquid to help keep them moist before storing. Reheat in the microwave. Second-day carnitas are fantastic in quesadillas, burritos, and burrito bowls.
And not going to lie, it’s also pretty satisfying to stand in the refrigerator and eat cold carnitas leftovers plain the day after a party (they get better on day two!).
Can I freeze carnitas?
Yes! Because carnitas are a real time commitment and the cut of meat you need comes as a pretty large roast, even if you’re part of a small household and not cooking for guests, I still recommend making the full-size carnitas recipe rather than trying to cut it down because carnitas freeze really well.
Just freeze meal-sized batches with a few spoonfuls of the cooking liquid in freezer-safe plastic bags. When you’re ready for more carnitas, defrost in the refrigerator. To reheat, microwave until warm or spread on a baking sheet and bake, loosely covered with foil at 350°F until heated through (usually 10-15 minutes).
Remove the foil and broil on high for just a minute or two until the edges are crisp. (Heads up: If you’ve just cleaned your oven, you might want to skip this step. The carnitas pop and sizzle quite a bit as they broil.)
What kind of meat are carnitas?
Pork! Carnitas are made from nice, marbled (with fat) chunks of pork shoulder, which when braised over a long period of time become incredibly tender.
The nice thing about pork shoulder is that it’s readily available, and it’s usually very cheap. Here is Southern California, I often see it as low .99/ pound. So for parties, feeding a crowd, or even stocking your freezer with leftovers, this is a very low-cost meal option.
You Might Also Enjoy
Carnitas Recipe Notes
If you’re making carnitas for an event, make sure to give yourself enough time to cook them. Between prepping the meat (especially if it’s bone-in), browning, the long, low simmer, and crisping time, carnitas always take longer than you expect, so allow yourself that time.
Easy Carnitas Recipe
Ingredients
Special Equipment
Carnitas
- 1/4 cup vegetable oil
- 4-6 pound pork shoulder roast boneless or bone-in, trimmed of fat cap and cut into fist-sized chunks
- Salt and pepper
- 1 large onion diced
- 1 clove garlic crushed
- 3 tablespoons lime juice
- 1 tablespoon chili powder
- 1/2 teaspoon dried oregano
- 1/2 teaspoon ground cumin
- 6-8 cups (3-4 14.5 ounce cans) chicken broth
Instructions
- Pre-measure all your ingredients, dice your onion, and prep your garlic. Once you get started cooking, things move fast.
- Generously salt and pepper pork chunks on all sides.
- In a large Dutch oven, heat oil over medium-high heat. Once hot, brown meat on all sides, in batches if necessary. This will take 10 to 15 minutes.
- Add onion, garlic, lime juice, chili powder, oregano, cumin, and enough chicken broth so the meat is mostly covered. Bring to a boil and then reduce heat to a low simmer. Cover and cook for 2 to 2 1/2 hours, until meat is tender and can be easily pulled apart with a fork.
- Preheat oven to 400°F and line a baking sheet with foil for easier cleanup. Use a large slotted spoon to transfer meat to a cutting board (reserve the broth) and use two forks to shred the meat. Transfer shredded meat to the baking sheet and spread it in an even layer over the surface. Drizzle 1/4 cup of the cooking liquid over the meat, sprinkle with salt, and bake for 10 minutes.
- Drizzle a little more broth over the meat, cook 10 minutes more, and repeat for a total of 30 minutes, until edges are crispy and browned.
- Serve and enjoy.
Notes
Recipe Adapted From AllRecipes
This post may contain affiliate links, which means I receive a small commission if you make a purchase using them. There is absolutely no additional cost to you.


SummerT says
So good! And coming from Houston Texas that’s saying something! We don’t eat a lot of pork here but love this recipe.
Brittany says
This meat turned out delicious! Leveled up from my usual pork taco recipe. I love the savory flavor and the little crispy bits on the meat. This recipe is one to print and put on repeat!
Bree Camara says
So far so good I can’ Measure anything because I don’t own any measuring cups or measuring spoons I do everything by eye so I just put all the ingredients that you had on there and added paprika and then we voted that it just smells just like barria meat from our favorite Mexican food restaurant in Maui. And see I’m a white girl that lives in Hawaii from California Orange County, where the Disneyland is , plenty plenty plenty Mexicans in California so I learned , didn’t learn how to cook this one, but your recipe came up first so voilà, white girl that tries to cook Mexican food and it’s just,, like amazing.!!!!
Sarah says
I’ve made this recipe a few times and it’s delicious! I enjoy making the carnitas into fried corn tortilla tacos, I add some refried beans, cheese and the meat to the tortillas and fry them, so tasty.
I like to do the final step of this recipe on the air fryer, it crisps up the meat nicely and doesn’t make a mess of the oven. Thanks for this delicious recipe!
Tracy says
The airfryer is such a good tip! Thanks for sharing!!
Jen says
These are fantastic. I’ve made them twice so far and I was looking up the recipe to make them again this week. My family raves about them. Guess I better write it down so I always have it!
Vikki says
Hi Tracy, we moved from California to Tennessee over a year ago, and let’s just say their idea of Mexican food is ground beef everything & no seasonings at all! Bland as can be! I have been looking for a good carnitas recipe & yours is in the dutch oven right now! It smells amazing. Going to make homemade Salsa & Guacamole to go with it.
I have followed your site for a while now. Made your maple pecan scones which were to die for! Thanks, Vikki
Michelle says
My family voted this a keeper.